Save $10 On Your First Install. Use Code BLOG10
-min.webp)
Auxe is operating as an essential business
Save $10 On Your First Install. Use Code BLOG10
This guide details how to wall-mount a Hisense Canvas TV by securing brackets to the unit, anchoring a wall plate into wooden studs at eye level, and lifting the TV into place with a partner for a flush, gallery-like finish. By prioritizing structural safety and precise leveling, you can transform the display into a seamless piece of digital art while hiding cables for a clean aesthetic.
By
Ali
|
December 18, 2025


.png)

.jpg)
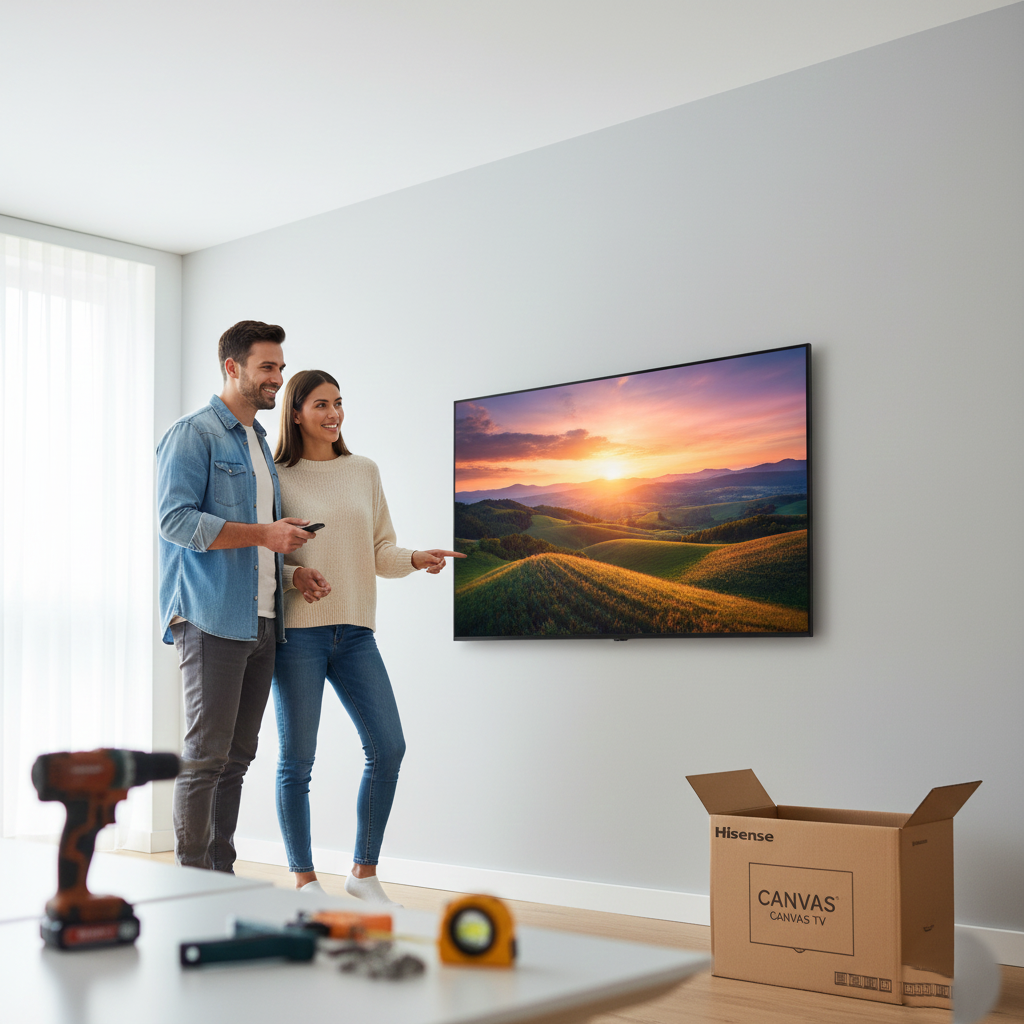
This guide details how to wall-mount a Hisense Canvas TV by securing brackets to the unit, anchoring a wall plate into wooden studs at eye level, and lifting the TV into place with a partner for a flush, gallery-like finish. By prioritizing structural safety and precise leveling, you can transform the display into a seamless piece of digital art while hiding cables for a clean aesthetic.

Hey everyone! If you just picked up one of Hisense's stunning Canvas TVs, you know the goal is to make it look less like a TV and more like, well, art. And to truly achieve that seamless gallery look, you absolutely need to get it up on the wall.
This isn't as scary as it sounds. I’ve put up a few of these, and with the right tools and a little patience, you can ditch that stand and get your masterpiece flush against the wall. Let’s dive in!
Before you even think about drilling, let's get everything ready.
Your Hisense Canvas TV and your wall mount kit will both have specific instructions. They might tell you the exact screw sizes needed (the VESA standard) and the specific load limit of your TV. Don’t skip this part.
You’ll need:
Safety Note: These TVs are large and heavy. If your Canvas TV is 65 inches or larger, always have a friend help you lift it.
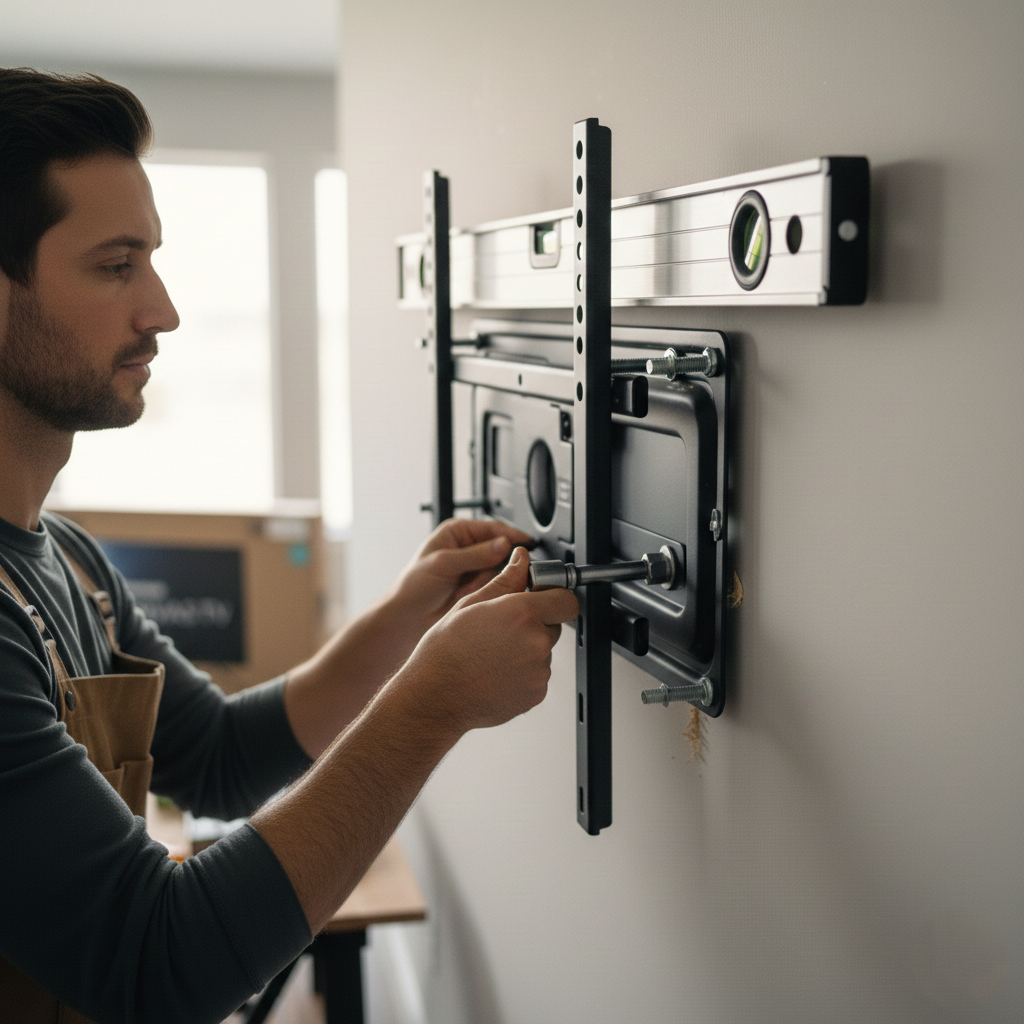
This is where you marry the TV to the mount.
Lay your TV face-down on a clean, soft surface (like a blanket or the original box foam) on a table or the floor.
These are the four pre-drilled holes on the back of your TV. This is where the mounting brackets (the parts that look like arms or strips) attach.
Align the vertical mounting brackets onto the VESA holes. Using the screws provided with your mount kit (or the ones specified in the TV manual—usually M6 or M8), screw the brackets securely into the back of the TV. You may need plastic spacers depending on the TV model's curvature.
Pro Tip: Hand-tighten these first, then use your screwdriver/wrench to snug them up. They need to be firm, but don't over-tighten and strip the threads!
Placement is everything for that "gallery" aesthetic.
The general rule of thumb is that the center of the screen should be at eye level when you are sitting down. For most people, this means the bottom third of the TV will be approximately 42-48 inches off the floor.
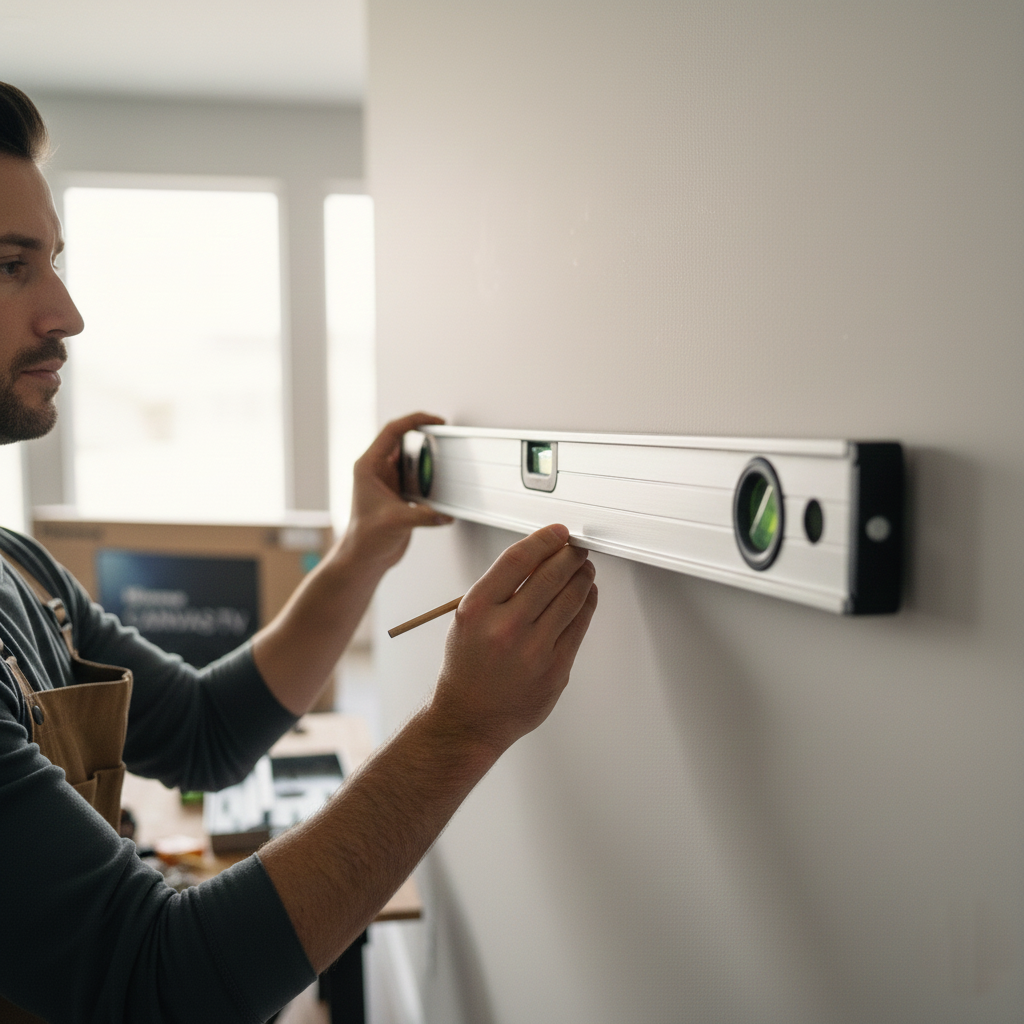
A TV is far too heavy to be held up by drywall alone. You must anchor at least one side (preferably both) of the main wall plate into wooden wall studs.
Use your stud finder to locate the center of the studs in the area you want to mount the TV. Use your pencil or painter’s tape to mark their centers.
This is the most critical structural step.
Hold the large wall plate (the main piece of the mount) against the wall at the height you determined in Step 4. Use your level to ensure it is perfectly straight.
While holding it steady, mark the center of the mounting holes that line up with your wall studs.
Using a drill bit slightly smaller than the lag bolts (the big screws for the studs), drill pilot holes through the drywall and into the studs where you marked. This prevents the wood from splitting.
Position the plate back over the pilot holes. Insert the lag bolts (or other heavy-duty fasteners supplied by your mount manufacturer) through the wall plate and into the wall.
Use a socket wrench to drive the lag bolts in until the wall plate is flush and absolutely secure. Give it a good tug—it should not move at all!

Time to hang your artwork!
If you have a wall that allows for hidden wiring (like a full-motion mount), run your HDMI and power cables now before the TV goes up. If you don't, have the cables ready to plug in as soon as the TV is mounted.
With your helper, lift the Hisense Canvas TV up. Carefully align the brackets on the back of the TV with the wall plate.
Depending on your mount type, you will either:
Once the TV is hanging, you will usually hear a click or have a small cord/screw mechanism that locks the TV to the wall plate. Don't skip this step! It prevents the TV from being accidentally knocked off the mount.
Grab your level one last time. If your mount allows for micro-adjustments, fine-tune the TV until it's perfectly level.
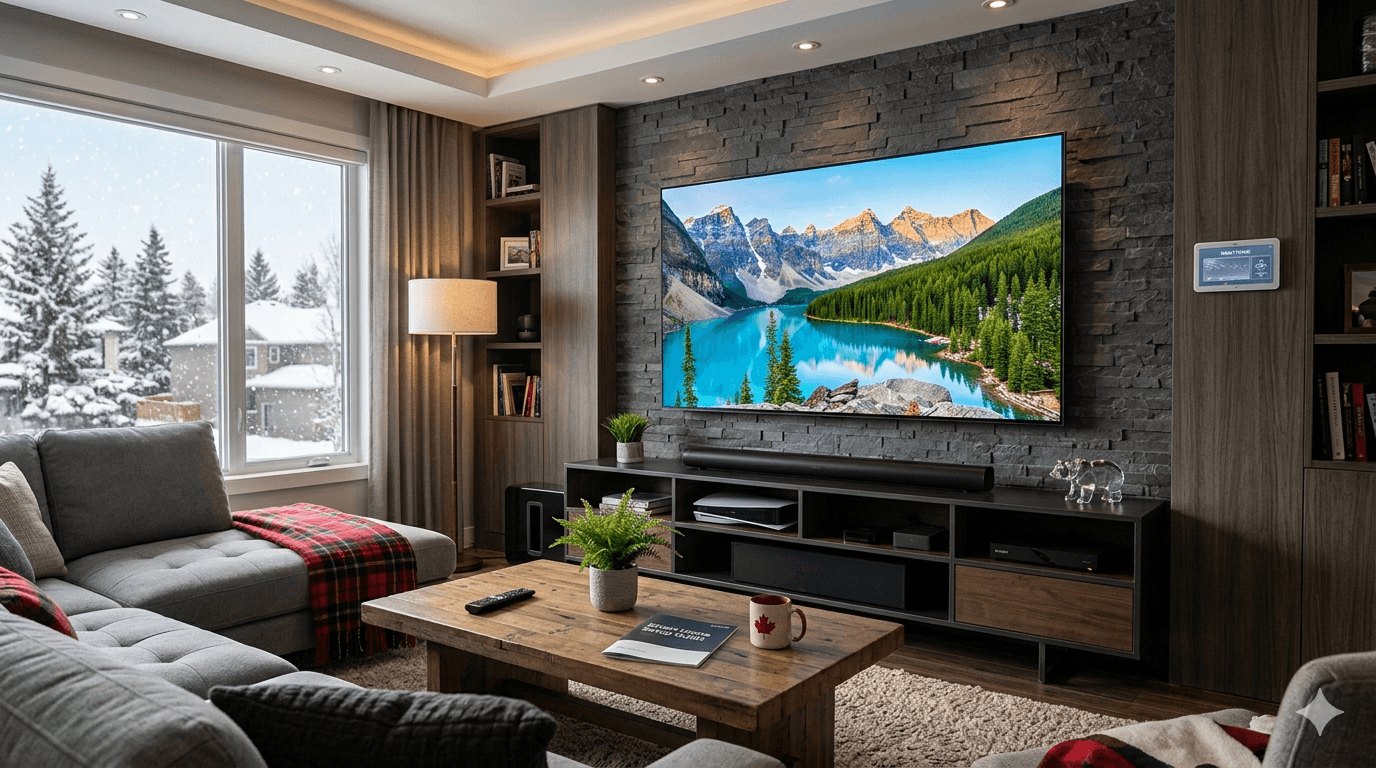
Congratulations! Your Hisense Canvas TV is now beautifully mounted. Step back and admire your new piece of digital art.
Now that the heavy lifting is done, here are a few things you might want to consider:
To achieve a perfect gallery look, it is always recommended to seek professional help to ensure your TV is mounted securely and level. For a seamless and reliable setup, consider the professional installation services at auxe.ca.


.webp)
Our online price calculator is free and requires no credit card, email, or contact information. Check it out!
Our online price calculator is free and requires no credit card, email, or contact information. Check it out!
.png)
%20(1).png)
%20(1).png)
%20(1).png)
.png)


.webp)


.webp)
%20(1).webp)


